


2021/04/19 Cloud Backup & Disaster Recovery Solutions 1251 visit(s)
Musab Ghannaj

Microsoft Store for Business and Microsoft Store for Education are designed for organizations and schools to give IT decision makers and administrators a flexible way to acquire, manage, and distribute free apps in certain markets to Windows 10 devices.
In this blog we will be covering how to manage business store and how to distribute free apps only. Since Microsoft will allow only free applications to participate in Microsoft Business Store starting from 14 of April 2021. If you already have a purchased app, then no need to worry at all. You will still be able to use the purchased apps, but you cannot purchase more apps and you cannot add more licenses to your purchased app neither.
With Microsoft Store for Business, you can do lots of things and spare lots of time for your IT team.
No one needs to spend time on installing applications or pushing updates for applications, as an engineer I like to spare this time and spend it on learning new technologies or work on useful tasks.
Microsoft Business Store and Intune both gives you lots of features as listed below:
Steps to Setup Microsoft Store for Business
To get started, first you need to enable Business Store from Intune, then you can follow the below instructions to do that:
o Navigate to Endpoint site by clicking here.
Note: you can access Endpoint site using the short link, https://aka.ms/dmac
o Click on Tenant Administration.
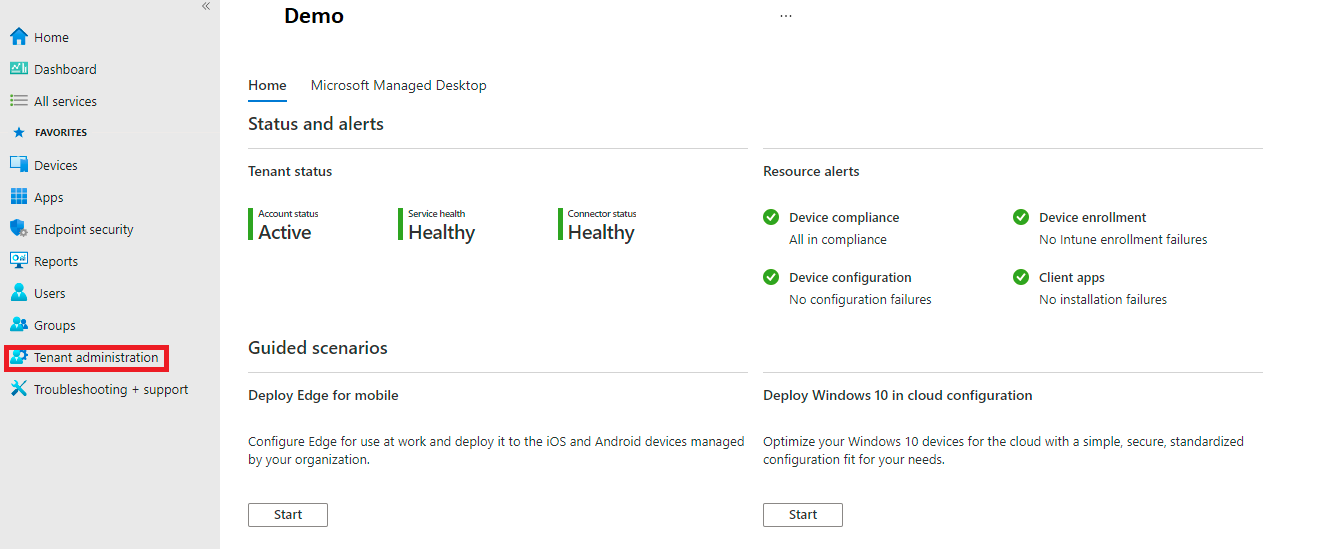
o From Tenant Administration page, click on Connectors and Tokens.
o From Connectors and Tokens select Microsoft Store for Business.
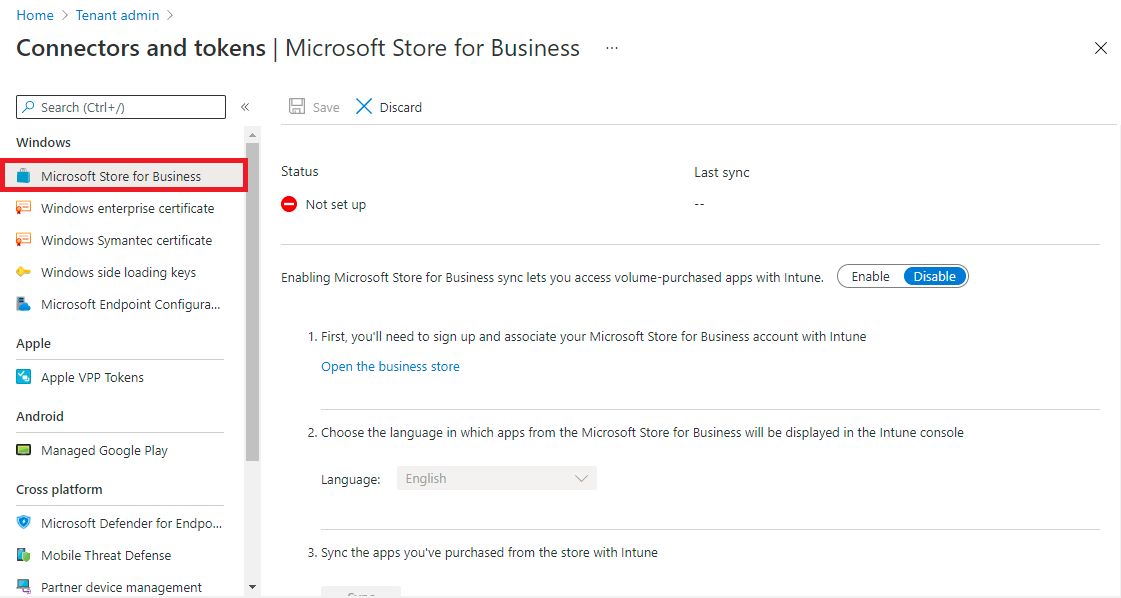
o Click on Enable to setup Microsoft Store for Business.
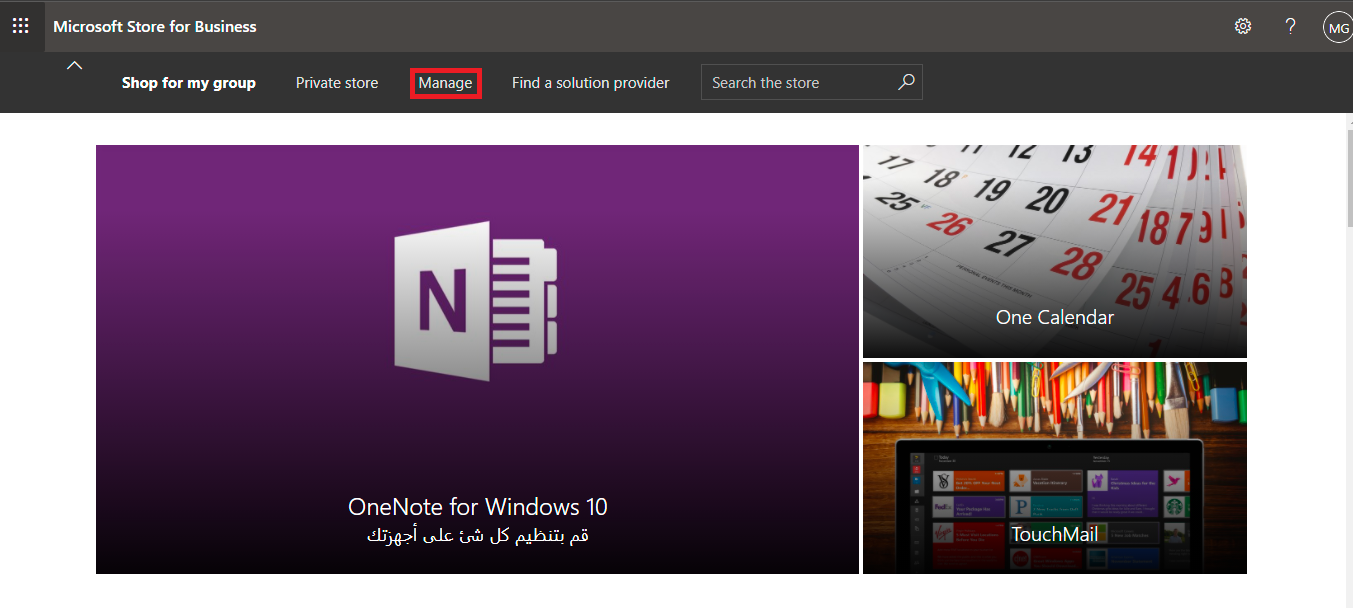
o Click on Open the business store link.
o The link is: https://BusinessStore.Microsoft.com: for Organizations and https://educationstore.microsoft.com: for Schools.
o Microsoft Business Store has a separate portal, to access it you need to click on the below URL, sign up and activate it to start using it:
§ https://BusinessStore.Microsoft.com: for Organizations.
§ https://educationstore.microsoft.com: for Schools.
o You will need to sign up by clicking on sign in and add your admin credentials to start managing it – You will need Billing administrator or Global Administrator – By default Microsoft prepared all services and make it ready for usage.

o Business Store Activation:
To start activating your business store, we need to follow the below steps:
§ Click on Manage in the upper menu.
§ In the Manage page click on settings from the left panel.
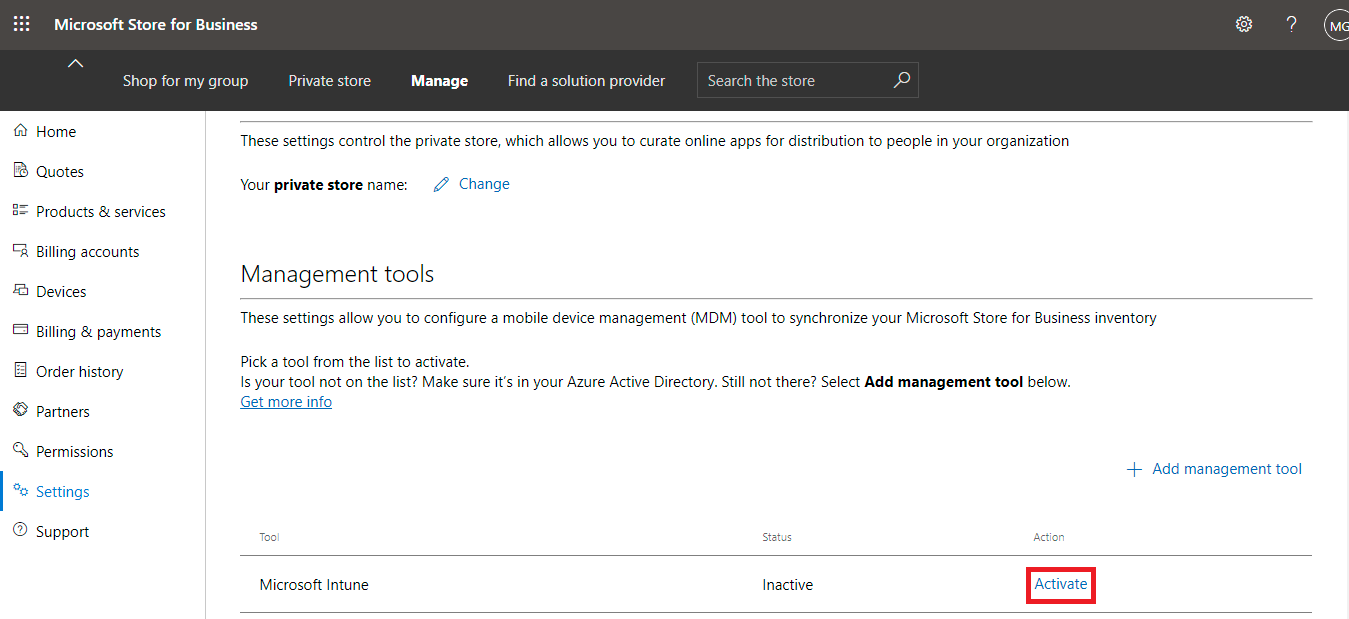
§ In the Settings page click on Devices from the menu.
§ In Devices page under Management Tools section click Activate button.
§ Now, we have associated Microsoft Store with our account in Intune. It is time to setup Private Store.
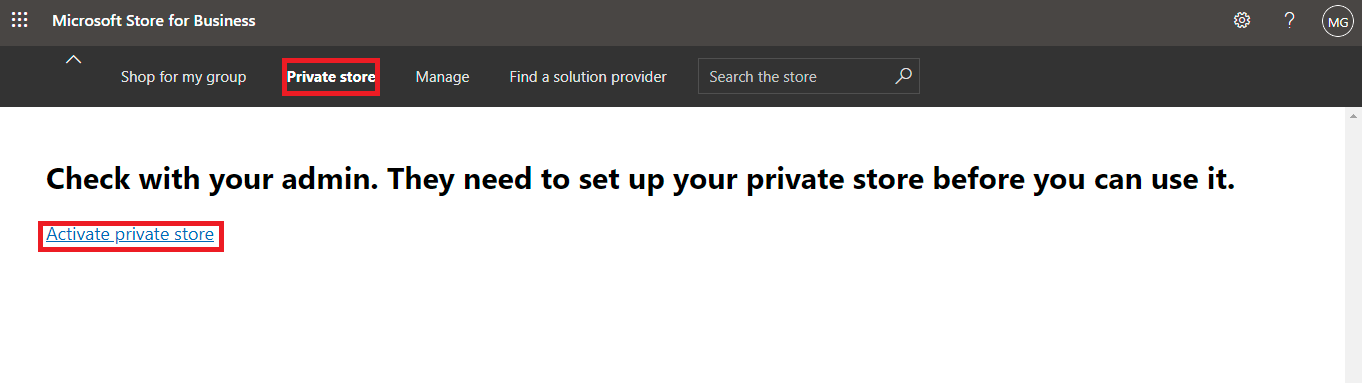
o The private store is a feature in Microsoft Store for Business and Education that organizations or schools receive during the signup process. When admins add apps to the private store, all employees in the organization can view and download the apps.
o Click on Private Store in upper menu.
o Click on Activate Private Store.
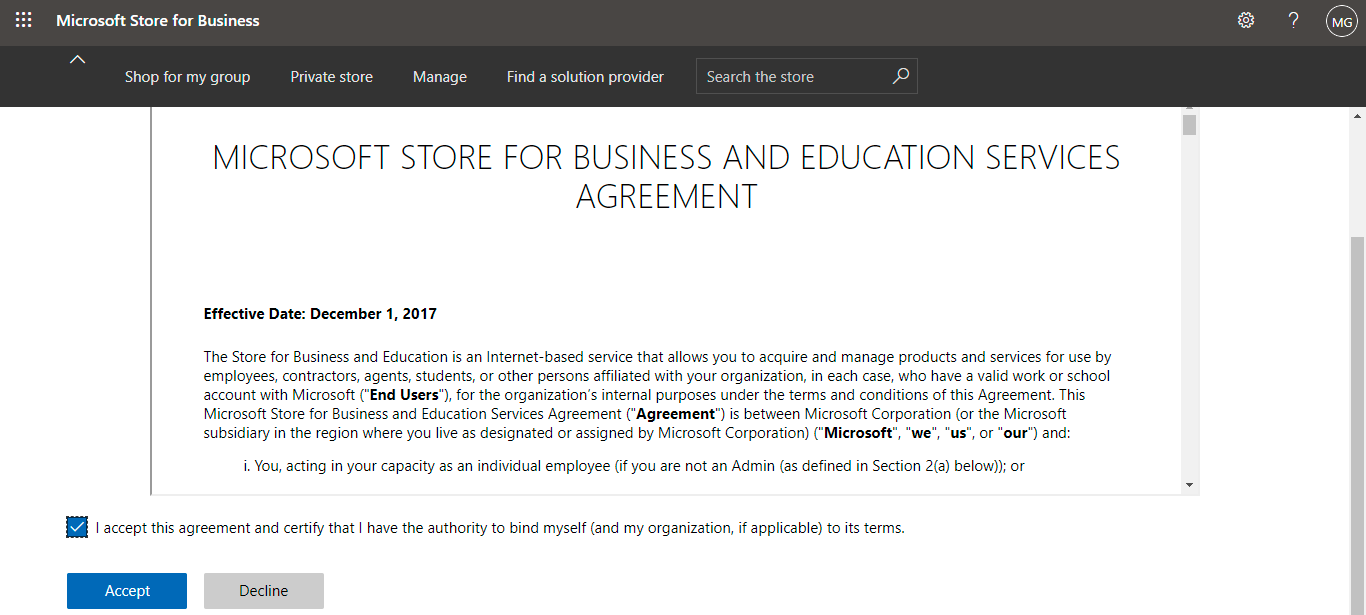
o Accept the terms and conditions by checking the check box and click on Accept button.
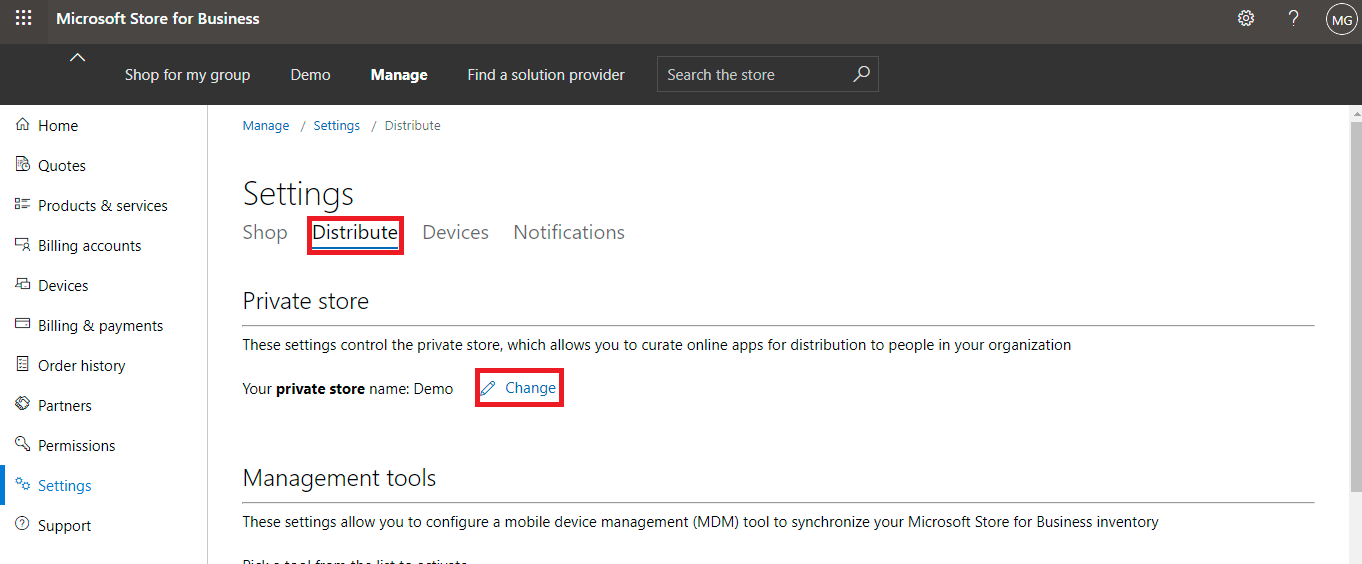
o Now we have activated the private store, we can rename it to match our organization name.
o Go back to Settings from Manage menu.
o From Settings Click on Distribute.
o From Distribute click on change to change the private store name.
· How to get an app and sync it into Microsoft Intune apps:
o It is always preferred to get an app from Business store and sync it to Intune not to assign directly from Business portal.
o First, let us get an app.
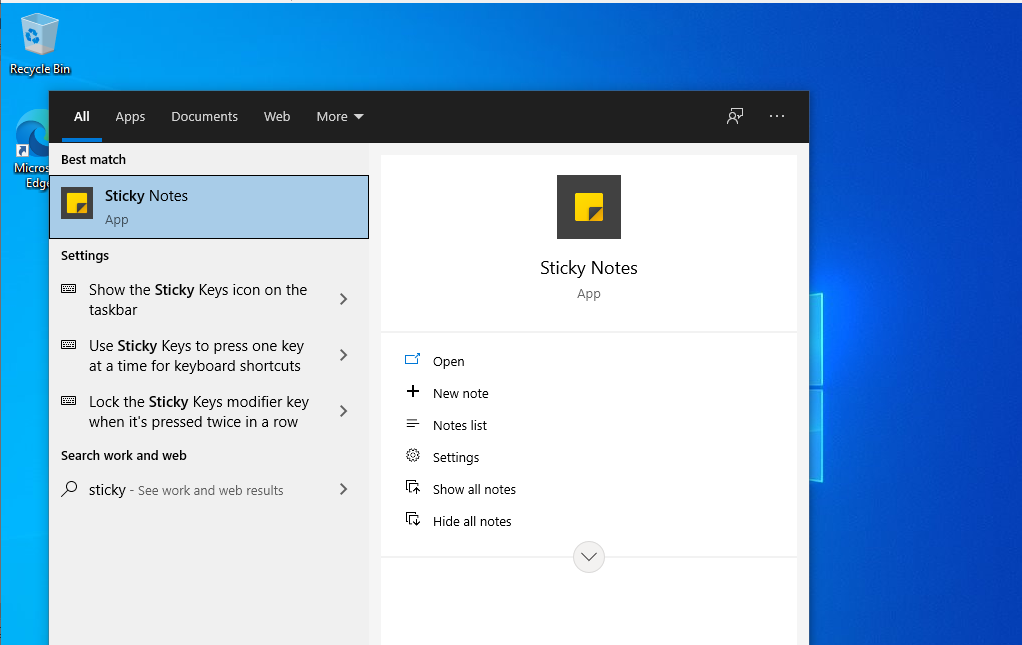
o In this demo, I am going to get Microsoft Sticky Notes as it is one of the most productive application and lots of users are using it for their daily tasks.
o From the search bar type Sticky Notes and hit enter.
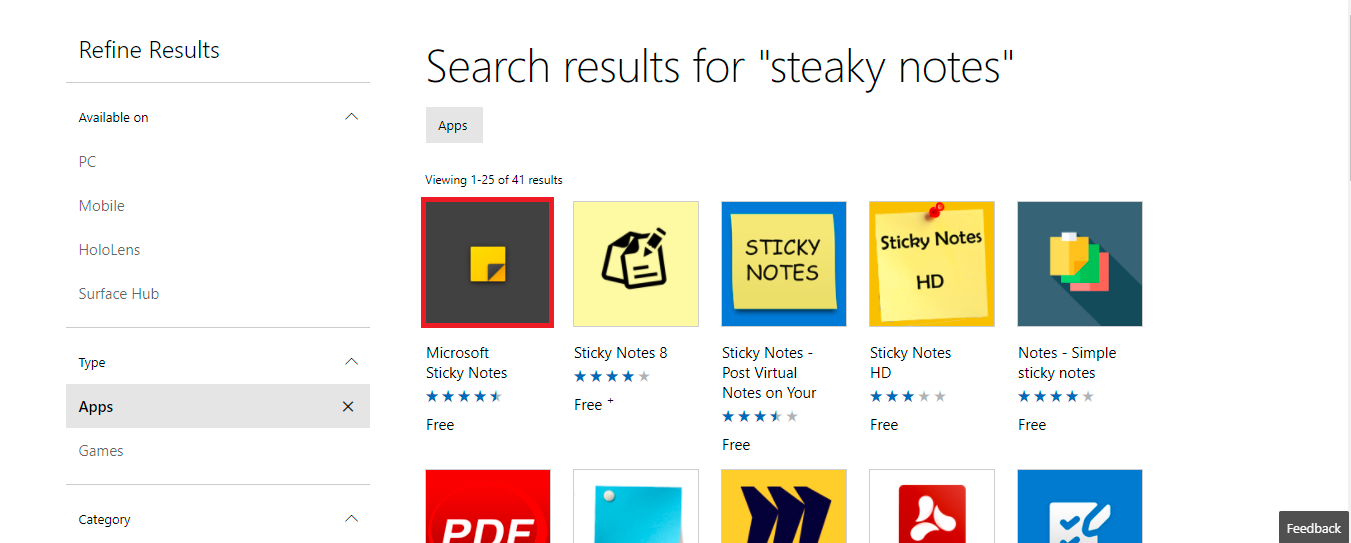
o Click on Microsoft Sticky Notes.
o Click on Get the app button.
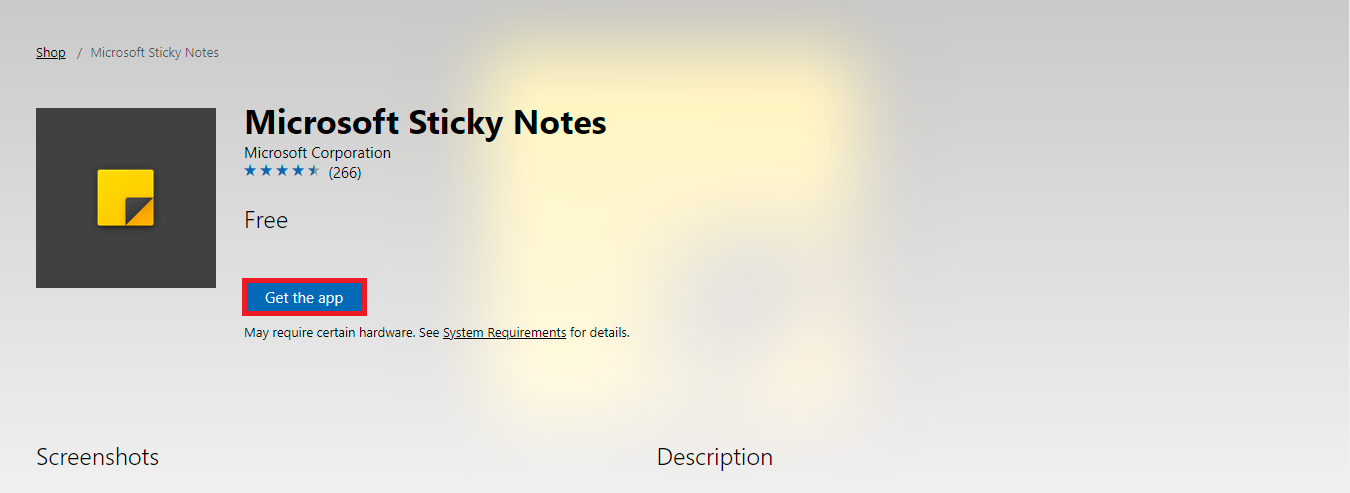
o Now the app has been acquired by the organization.
o Do not Install or assign the app now. We will assign it in Intune.
o Go back to Microsoft Store for Business settings in Intune.
o Click on Sync button.
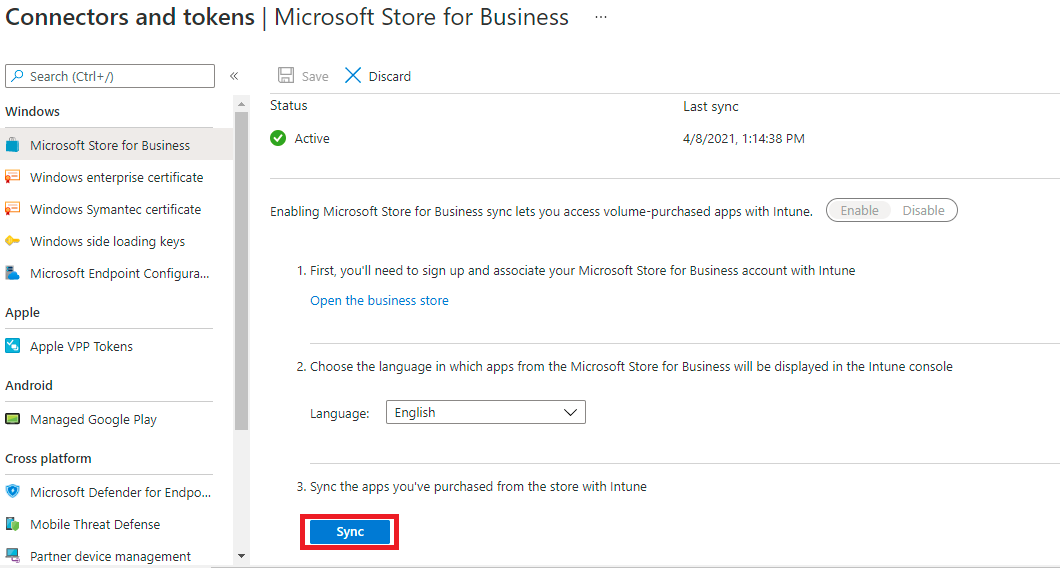
Note: Sync the application will take some time to sync all the apps from Business Store and Intune.
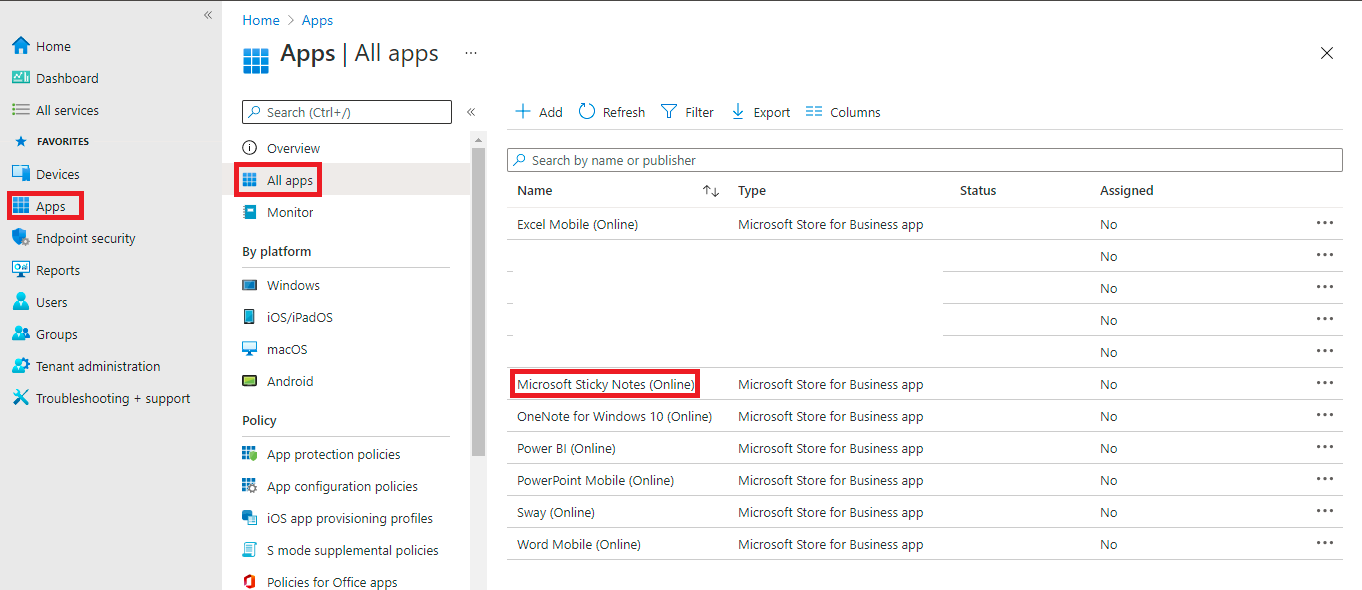
o To check the apps that was synced successfully go to Apps:
§ Click on Apps from the left menu.
§ Click on All Apps.
§ In all apps you will find the all apps included in default collection along with Microsoft Sticky Notes that we get earlier.
· Push applications into Enrolled Windows 10 Devices
o Click on Microsoft Sticky Notes (Online).
o From Application main page. Click on Properties.
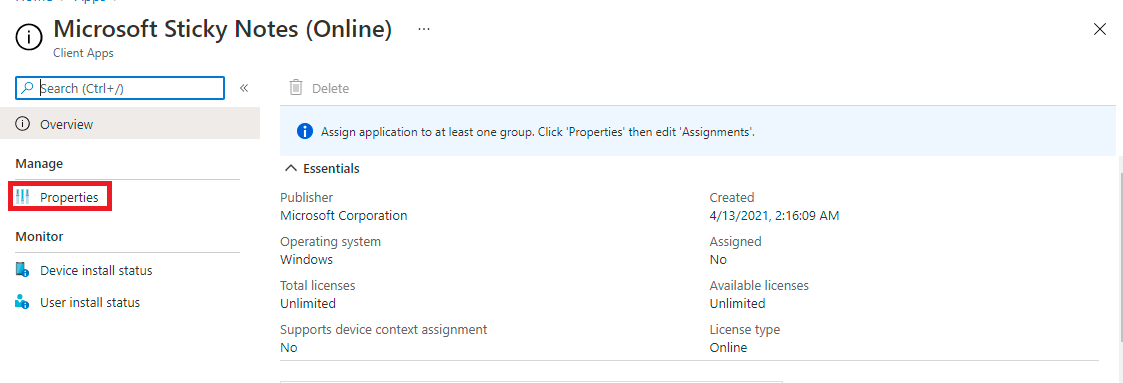
o From Properties page, at the end of the page click on Edit beside Assignments.

o From Edit page add a group under Required.
§ I already have a security group with demo virtual machines.
§ Add the security group of devices.
o Click on Review + Save.
o Wait for the applications to be synced on the devices.
Note: To speed up syncing the application to the devices, search the device in Intune and click on Sync button.
o Once the device is synced the application can be pushed and installed.
We hope we've managed to help out!
Musab M. Ghannaj
Ctelecoms
Take your IT infrastructure to the next level ...